July:Planning Your New Season’s Vegetable Garden
Tips for getting started on planning your new season vegetable garden.
Today is very cold and wet in the part of the country I live in so I am opting for an indoor day today. The ground is too wet to dig, the paths are too muddy and it’s too cold and miserable to be outside for too long. I’ve been out and fed the chooks making sure I have given them plenty to eat as its miserable for them too. The cat has had her breakfast and we have as well. Today I have the guilt free luxury of getting time to think and write.
A wet winters day is a good time to plan your new season vegetable garden. For me, the winter solstice and the short winter days it brings is the start of a new gardening year. Garlic is symbolic of that first planting to make for the summer harvest. For those of you following my Crop Rotation Poster, it’s the one where I rotate to the next bed. Garlic comes under Group 4, and they now move to the bed where I previously had Group 3 Heat Loving Vegetables. The frost has made sure the previous inhabitants have long gone; the pumpkins stored,tomatoes relished, excess courgettes and corn in the freezer and the bed dug over and made ready for the root crops to follow.
So now I take a look at my own copy of the Crop Rotation Poster and remind myself what goes where. It is a jolly useful tool and if you have’t got one yet then see the link below.
To start you off with your planning here are some of my suggestions.
1. Plant what you like to eat
2. Plants you can preserve and store for winter.
3. Plants that will supplement and extend the family budget.
4. Match your specific needs.
5. Plants that bring joy
6. Make sure the size of the garden matches the size of the time you have available.
Plant What You Like To Eat.
Come up with a list of vegetables you and the family like to eat. There’s no sense in planting vegetables that no one is going to eat. When the lockdowns were first announced and we were given 2 days to go into hiding, you may remember that all of the garden centres were ransacked for vegetable seedlings – with the notable exception of brussels sprouts. Oh dear. I know lots of people do love them but they are not high on my list of favourites. So think about what you and your family like and plan to plant those. Don’t forget herbs - there are plenty of easy grow herbs that you will thank yourself for planting when you want to flavour your dinner and need a bit of parsely, sage, rosemary or thyme.
2. Plants You Can Store or Preserve.
A common trap for new gardeners is to sow or plant everything at once and you therefore end up with a summer glut. That means you have 6 cabbages mature all at the same time for example. However, there are some vegetables that you can grow, eat when they are ready but also store or preserve in some way. Pumpkin is a great one for this. They taste better after storing and are very delicious to use for roasts and soups over winter. Beans, courgettes and corn can all be blanched and frozen. Tomatoes can be made into sauces and bottled or frozen. Most can be made into pickles or relishes for the larder. So you can never have too many tomatoes in my opinion. Root crops can be stored in a cool place or left in the ground.
3. Plants That Extend the Family Budget
Never think that you have to either be self-sufficient in your backyard vegetable garden or you might as well not bother. If you are short on time or have minimal space, then think of things that are easy to grow and available when you need it. Silverbeet, courgette, celery, parsley for example. You are going to go a long way to helping extend the family budget if you have even a small vegetable patch and can pop down and pick some leaves to go with dinner. Lettuce is a great example. They will grow most of the year around and you could easily harvest enough leaves each day for a healthy homegrown salad. Think about how you can supplement the family budget by adding what you have grown. You have the added advantage of the extra health benefits that come from spray free food as well.
4. Match Your Specific Needs.
Have you heard of the Celery Juice craze? If you follow Tony Robbins or other motivational gurus you’ve probably heard of the Medical Medium who advocates for the health benefits of celery juice. Now I personally don’t think we need and off-world entity telling us to eat more vegetables – its nothing that our mothers and grandmothers haven’t already told us - but if you do enjoy vegetable juices then plan to plant them in your garden. Celery can be very expensive out of season – plus it is traditionally one of most highly sprayed of commercial crops. If you are juicing for health, then you are going to want a good source of organic celery. So grow your own. Same for beetroot, kale or the other plants you like to juice.
5. Plant things that bring joy
Don’t just make your vegetable place a prosaic practical business end of the section. Add a few flowers for your own joy, and for all the beneficial insects. Butterflies and bees will love you for it. So will your children. If you have children (or grandchildren, or great grandchildren!), then one of the best things you can do for them is make the vegetable garden a happy place to be. I have always grown peas for that very reason. They are not the best crop really for the home garden because you probably need a few acres to have enough to warrant growing, but if you have toddlers or young ones, nothing beats eating peas straight from the pods. Let them have their own patches if you can and grow what they want. I remember having my own childish imagination inspired by the petals of the Iceland poppy – so pop a few of those in for fairy frocks.
6. Match Size of Garden to Time Available.
Finally, you want to make sure you have the time to care for the garden you want to grow. Nothing beats the enthusiasm of the bright new gardener and if you love it you will make the time. But watch out for making a rod for your own back. There’s nothing worse than seeing the weeds taking over, the jobs piling up but you are tied up working long hours on your day job. It can be heartbreaking. So start with what you can manage and grow from there. There are ways to plan for and manage your time in the garden and I will be writing about that later, so I don’t want to discourage you from starting your garden but just be a little mindful. Your garden should be a place of nourishment for the soul just as much as for the body so make sure you don’t overload yourself.
June in the Kitchen Garden
June has arrived and with it the beginning of winter proper. This is the month of the winter solstice where we experience the shortest day/night around the 21st of the month. We call it mid-winter but it’s really only the beginning of the 3 main winter months here in the southern part of the globe of June, July and August. Of course if you live on the other side of the equator it is the summer months.
There will still be beautiful cold clear days and still a bit of warmth in the air if there is no southerly or westerly air flow. So still some days to get out into the garden – and some days to sit by the fire dreaming of your future garden. I always like to have some flowers on the go to use on cakes or just to bring indoors to cheer up the grey days. I would never be without the self sown calendula with its bright sunshiney colours and shape. I’ve just found a self-sown one in the garden that is exactly like the calendula (or marigold) we had in the garden when I was a kid! Funny what the memory selects to remember.
Its still a tidy up and prepping for the next season month with some cultivation of those vegies still growing. Here in New Zealand we now have a national holiday to mark Matariki – the Māori name for the Pleiades star system rising in winter over the eastern horizon and indicating the time to finish harvesting the old season’s crops and turn attention to the new year. For those of you using the Crop Rotation Calendar, this is when I start rotating around to the next season. I have a free template you can use if you want to start planning your new season garden now or just want to use it to keep tabs on your garden cultivation. Click here to get your copy.
Garlic
Traditionally of course it is garlic planting time and this is the crop that kicks off my gardening New Year. You will be rotating your root crop bed (Group 4) to where you had the heat-loving (Group 3) fruiting plants – most of which will be long frosted and died back Clear back any foliage, dig out weeds and where you are going to plant garlic and onions, dig in plenty of manure and compost. Note: Don’t compost the whole bed – leave the area where you will be planting tap roots such as carrot and parsip free from fresh bulky manure. A little bit of ash from the wood stove (as long as its chemical free of course) will provide potassium needed for these plants.
It’s the shortening of the day length and the chilling of the air that is going to trigger bulb growth and a good crop. I think everyone should grow a few rows of garlic at least. It doesn’t take up too much room and you can grow a year’s supply with some extra to give away or save for replanting. This year I took some braids of last year’s crop up to Auckland and gave some back to my brother-in-law, Trent. They were ones I had grown from seed he had given me years ago. I must check with him that he is going to plant some – just in case I lose mine and need another supplier!
You can use some of your best and biggest corms from the last season, buy some in from specialist seed growers or from our local garden centres. When you are ready, mark out the rows and plant pointy end up about 5 cms deep and about 20 cms spacing. Mark your row and mulch. Make sure you can hoe easily down the rows for ongoing weed management.
Other Crops
It’s not all about the garlic though. There’s plenty of other jobs you can get up to on the days you can get outside – remembering to never dig over waterlogged beds. If you haven’t done so already, turn your attention to perennials such as rhubarb, asparagus and strawberries. My rhubarb must have felt the mildness of May as it is only just dying down now and some that I replenished a month ago has produced new growth. If you are in warmer parts it will still be providing you with delicious stalks for a bit longer still. Pull off any dead or dying foliage, weed any sneaky weeds and then give a good dressing of manure and straw to take it through winter. If it has been in the same space for more than 3 years then dig up, divide and replant into well manured deep soil then water well and mulch as described.
Similarly for asparagus, chop back old foliage, weed and mulch well with seaweed and straw. Prepare any new asparagus beds now ready for late winter or spring planting by weeding thoroughly, filling with manure and seaweed then backfilling with good soil. Should be just right for planting in a month or two. New strawberry plants can be replanted from now on.
Keep liquid feeding your green leafy crops, broad beans and celery and leeks. Those last two along with stored root crops will provide the basis of your winter soups. Keep planting a couple each of brassicas every 2 weeks or so to keep up a supply. Remember you can still sow or plant winter greens such as rocket, meslun, corn salad, mustard and some lettuces. If you haven’t got a suitable warm well drained spot in the garden then plant in pots and pull inside when frosty. Chop or pull leaves as needed – the most nutritious way! Herbs also can be potted up and brought closer to the house for ease of use.
Pruning season is coming up so get your tools ready by getting them cleaned and sharpened ready for a dry day to get to work on your fruiting plants. So always something to do if you want to but always a good time to be inside and think about next season while eating the preserved produce of this last season’s harvest.
The Time Poor Gardener. (or the Fair-Weather Gardener)
For those of you short on time and who prefer to hibernate for winter, clear each bed in your garden and then check what the requirements are on the Crop Rotation Poster for the plants you plan to grow in each bed in spring. Compost where it says compost, feed where it says feed and make sure you match the fertiliser to the crop you are planning on growing as per the advice under “what to do in Winter”. Water well if needed, maybe chuck over some lawn clippings and then cover each bed with a sheet of plastic, weedmat or thick cardboard. By the time the sap has risen and your gardening blood has warmed up you will be ready to go come spring with a lovely new blank weed-free canvas!
Garden Jobs for June
Sow indoors; brassicas such as broccoli, cabbage, cauli and winter greens.
Plant: Garlic and Shallots, broad beans, green crops, flowers such as pansies and violas. Plant brassica seedlings such as broccoli and cabbage, cauli and bok choy for spring eating. Strawberry and rhubarb.
Cultivate: Use liquid manure to feed your leeks. Keep weeded and mounded up. Cut back asparagus fern, weed and mulch crowns. Split big clumps of rhubarb and replant. Keep weeds hoed, green crops sown and mulches laid.
Harvest: Silverbeet and spinach, broccoli, parsley, and any other herbs and vegetables you have growing in your garden.
New Years Resolutions and the Anti-Diet Diet.
Aaahhh – the approach of a New Year – the time when many of us, irritated with ourselves for not being where we thought we should be or wanted to be by the end of the old year, resolve to do better next time. So we come up with another list of resolutions, probably the same as last time and also like then, ones we are not likely to fulfil. For a lot of women (and men) weight comes very high on that list and we promise all sorts of thing to ourselves in the drive to do better. We resolve to make all sorts of changes, often all at once, starting on 1 January every year. How has that been going for you so far?
After many years of doing just that, I ended up stepping off that bandwagon altogether. Last year I published a sort of anti-diet diet book. The Tortoise Diet Method (the word “diet” is crossed out on the cover of the book) is the book for those of you who never want to go on a diet again but still want to look fabulous and probably most important of all, stop the upward trend that the scales have been reporting back to you when you have been weighing yourself over the years.
You see – I finally figured out, after repeating the same behaviour over and over again, that New Years Resolution type behaviour, where we attempt to install a whole lot of new behaviours all at once, is doomed to failure. It reminded me of the Hare in the ancient fable by Aesop of the Tortoise and the Hare. Clearly nothing much has changed in the intervening 2500 years or so since Aesop wrote his tale about human behaviour, as most of us still act like the Hare, hitting the race with a hiss and a roar (making all those changes all at once and promising to do so for the next year) but losing focus, getting distracted and finally, caught napping while someone else wins the race.
So after deciding to stop repeating what hadn’t worked, I thought about taking a good look at what did work. My focus turned towards the Tortoise in the story and I started to see the value of the slow and steady type of behaviour.
Of course, most of us don’t like anything that sounds like it is going to take time to get a result. Our world these days is set up for instant change, instant gratification, the miracle diet that is going to solve all your weight issues preferably by last week. It takes a bit of a paradigm shift to stop that kind of thinking and really start to address what needs to be addressed, put into practice the sort of behaviours that need to be practised, and take effective steps over time to win whatever the race is for you that you haven’t been able to win up to now.
I’ve been a journaller for much of my adult life. It makes painful re-reading to go back over the years and see the oft-repeated goal for each New Year to lose a whole lot of kilos. Quite frankly, I never managed to do that and in fact, each year, my weight instead got gradually higher and higher. I figured that although my weight went up and down, it was actually trending upwards. Once I came to my senses and got very real about what was actually going on, I realised that I could predict my future from that trend line. And the future wasn’t looking pretty.
If I kept going at the rate I was, then my weight would continue to go up. The outcome of that was not just that I wouldn’t look great in the clothes I wanted to wear, but the health issues that start to occur along with unnecessary weight gain. A bout of gout (I was nowhere near old enough to have that!), a blood-test that showed warning signs for my health, and the failure to once again reach the weight target I had in my head, led me to finally take a good look at the situation and start addressing it in a realistic way.
The first thing I did was to stop the dieting. By that I mean, I stopped embarking on every new miracle diet that turned up promising incredible results in an incredibly short period of time. When I looked back over my life, I realised that I wasn’t even overweight when I started dieting in the first place and in fact, the act of dieting itself was one of the catalysts to a lifetime of weight gain. I also realised that the times I was a steady appropriate weight, that I was eating quite normally and not consciously even thinking about food. I was eating normal nutritious meals with nothing much in between, mainly because I was busy, involved in meaningful life and just focussing on living rather than what I was going to put in my mouth next.
Which started me thinking about “what if’. What if I had never started dieting in the first place but just carried on eating the normal 3 nutritious meals a day that I had grown up with as part of family living on the farm. I realised that the act of dieting itself, triggered a lot of disordered thinking, which led to disordered behaviour, which repeated over time, led to the lifetime of yoyo weight loss and gain that many of us experience as the reality of our lives.
And what if instead of aiming to lose too many pounds or kilos in too short a time, I lengthened out that time, lowered my expectations, and aimed to lose a realistic and achievable amount each month and kept that off? In fact, what if I aimed to lose a kilo a month?
And what if I could stop obsessing about weight and the scales, stop weighing myself all the time and putting so much emotional weight (sorry about the pun) on that number the scales are reflecting back at me, and either stop weighing myself altogether, or weigh myself once a month?
I know a lot of you stopped reading at the ‘one Kilo a month” bit but I want you to stay with me for a minute. I know you may have a lot of weight to lose and sure, some of those miracle diets do work if you stick to them for a decent amount of time. But what happens when you stop the diet and go back to your normal life? What happens when the stressful troubled times come to disrupt your routine and trigger the overeating problem you may have in times of stress? What happens then? You put it all back on of course plus a bit more. Now you feel even worse about yourself and more susceptible to the false lifelines being thrown to you so you do the same thing again. And each time ending a little heavier than the last.
I am saying, what about losing slowly and sensibly without dieting but giving your body the nutrition it needs, eating regular meals that are not too far from what is normal for you. Then gradually increase the types of food that you are know are good for you at the particular stage of life you are in right now, so that eating well becomes a habit for you. That way you are more likely to stick to it and you are more likely to make deep effective changes over time.
That is the basis of the Tortoise Diet Method. No dieting, but eating what your body needs and what you truly enjoy as part of a well-rounded life, focusing on living life, and allowing your weight to sort itself out naturally. For most of us there is a lot of healing that needs to take place to address the sort of old behaviour that led to weight gain in the first place, so you do need to allow yourself time to address the issues, time to put into practice the right thoughts and right behaviour and time to tweak your environment to support success. Which is why I advocate taking a whole year to establish a good foundation for the best sort of future for you – and which is why now, at the beginning of a new calendar year, it is a good time to be taking a look at a successful system such as the Tortoise Diet Method rather than throwing yourself full swing into the old way. That way has already shown it doesn’t work.
If you want to know more, you can buy the book from me on the link below, or you can buy it from Amazon. You are welcome to do either but of course I would prefer that you buy direct from me – that way I get to know you and you can choose to become part of a community to support you. I can safely say that as this year comes to an end, my weight trajectory is trending downwards, and I still have more to go. Join me this New Year in taking effective action towards reaching your goals -whatever they are.
The ultimate prepare ahead desert - icecream
The time of the year when preparing a fabulous desert the day before is such an asset is now - Christmas time when we seem to have so much to do and so little time to do it. I always find that no matter what happens when it comes to hosting family meals, if you have a fabulous desert hidden away that you can bring out when the time is right, then all is forgiven and forgotten. And what can be more fabuolus than pre-rolled balls of homemade plum icecream served in an icebowl you also made several days before, to accompany a white chocolate cheesecake - you guessed it - made prior. Its the classic, “here’s one I prepared earlier” scenario.
Like many of us, families are more complex and complictated these days and as some of ours were going to be celebrating actual Christmas Day elsewhere, we took the opportunity to get together a little earlier to see the kids and share pressies. Our orchard has matured enough now that we were able to sit under the trees and enjoy the fresh air and shade - a special time.
I have a couple of versions of this recipe depending on the flavouring used but I’ll start with the one in the picture. I already had pureed plum from the previous season in the freezer. I can’t remember the name of the plum just now but it is quite a strong black doris type flavour. Delicious. Just right to go with the more subtle white chocolate cheesecake. This amount makes a lot of icecream
Homemade Icecream recipe
Makes about 1-2 litres.
Ingredients.
4 eggs separated
1 cups sifted icing sugar
300 mls cream, whipped
2-3 cups of pureed plums or other fruit of your choice to taste.
Method.
1. Beat the egg whites like you are making a meringue – until soft peaks form, then add the icing sugar a little bit at a time until it is nice and still. Carefully transfer into another large bowl and keep cool while you whip the cream.
2. Beat the cream.
3. Using an egg beater or whisk, whisk the egg yolks and add your flavouring to the egg yolk until well mixed in.
4. Gently fold all together, put into whatever container you are using , cover and freeze.
You don’t really need to do anything else to it - but it will save time if you can soften it slightly and roll it into serving portions before hand. Just pop straight back into the freezer and then take straight to the table.
Christmas Spice Biscuits
Christmas is one of those times where everyone seems to loves tradition and that includes a lot of the treat foods you associate with your own childhood festivities. I still remember the year my clever and creative sister made a gingerbread house which took pride of place on the china cabinet. Mum always made the Edmonds cookbook Belgium Biscuits which we stuck together with homemade jam and had a lot of fun icing. I have done it with my own children and still do- even thought they are all grown up. The smell of the cookies baking definitely brings back good memories for me and I hope they do for you.
This is my version of the classic Belgium Biscuit recipe. It is a double size so you get enough done in one session to make some for your tins and some to give away. I prefer a slightly crisp less cakey biscuit so have only one egg and 1 tsp baking powder in this recipe. This should make 4 trays of biscuits which you can either cook one at a time while you cut the next batch or double up in your oven. Swap trays halfway through cooking if you do double up. Traditionally the biscuits are either spliced together with jam and iced or iced individually. I suggest using a smaller size cutter for the double ones.
Ingredients.
250g butter softened.
150g Brown Sugar
1 egg
4 cups plain flour
1 tsp baking powder
2 tsps cinnamon
2 tsps ginger
2 tsps mixed spice
2 tsps cocoa.
Method.
Turn oven on to 180CCream softened butter and sugar then add the egg and beat well.
Sift together the dry ingredients and add a 1/3 of the flour mix at a time to form a dough. If too soft add a little more flour. You don’t want it to be too sticky. .
Tip out onto a floured surface and bring together to form a firm dough.
Divide into 2. Form both into disc shape then wrap one in plastic wrap and pop in fridge until you are ready to roll. Roll the other one to approx 3-4 cm thick. Cut out shapes using your biscuit cutters. Place on a cold tray and bake at 180C for 15 minutes or until cooked. Gently transfer to a rack to cool.
While the first batch is cooking keep cutting the next one ready to go.
When cool you can either decorate individually as a single cookie or put together with jam and ice the top one. I use blackcurrant jam but any berry jam would work.
Icing
You can either ice with butter icing or royal icing or both! This year I iced the base with the butter icing then piped the royal icing on top. Others prefer royal icing which hardens into a more shell like texture. Pipe around the shape first and then infill. Have a cup of hot water handy to dip your spreading knife in to help spread the icing evenly. Have fun decorating!
Butter Icing.
25g butter melted with a little vanilla essence.
1 cup sifted icing sugar
A little boiling water to mix.
Add drop of food colouring.
Royal Icing.
2 egg whites
2 cups sifted icing sugar
Couple of drops of lemon juice.
Beat egg whites until stiff peaks have formed. Add lemon juice then a ittle icing sugar at a time until smoothly combined. This will make your basic white icing. Divide into smaller bowls and add food colouring.
Allow icing to dry completely before packing away.
Early Summer in the Backyard Vege Patch
Peas growing beautifully - Sown in Spring.
Water, weed and Feed
Its mid-November now and those of you who are gardening down here in the part of the world where I live in the southern hemisphere (New Zealand) are in the midst of peak planting time. By November the ground should have warmed up enough for you to get most of your vegetable plants in to the outdoor garden and you should have a good planting of everything in the ground. Even if it is the first row of something that you are going to keep succession planting – but the combination of day length and increasing ground temperature means that the conditions are just right for peak growing.
That includes those more tender heat loving plants such as green beans of any sort, climbing, dwarf, butter, French etc that will emerge from the soil when the ground temperature is right. If you have the more perennial type bean such as scarlet runners already in place in your garden, they will only emerge when that temperature is reached. You will then know that its time to get beans in. The exception is of course broad beans which prefer cool growing conditions so go in autumn and early spring. You can still pop some peas in but they also prefer cooler temps so we normally get those it the ground earlier in spring and autumn. So your Group1 bed can be all planted up by now.
Everything in Group 3, the heat loving group that includes tomatoes, courgettes or zucchini, cucumbers, chillies, aubergines, pumpkins, squash, sweet corn – anything in those family groups can go in now if you haven’t already got them in. We often try to plant these a bit too early – it might work if you can protect them from frost and cold snaps, but sometimes its best to wait. For those in cooler temperate regions, if you are growing pumpkins to store for winter, then get them in as soon as you can. They will need plenty of heat and compost to get their full lifecycle done in time to produce a crop. You many still need to watch for late frosts and cover to protect.
The root crop bed should also all be planted by now – at least your first or main crops. (Group 4). Garlic planted before or around the shortest day should be growing well and putting effort into growing some good size cloves. Keep liquid feeding it and making sure it has enough water while it is still at the growing stage. From next month you will start to ease off on the water to allow the maturing to occur. Like garlic, onions are very much connected to day length – they will grow as the days get longer and then start to mature and finish off their lifecycle as the days get shorter. Keep watering well to ensure good bulb growth, feed and weed.
Carrots you can succession sow but you should also have your main planting in by now. Any of those root crops that you can store like carrots, parsnips and potatoes, you should have a good planting in by now. You don’t have the problem with too many coming ready at once like you would do if you planted all your brassicas at once for example because roots crops are designed to store. Keep sowing beetroot – if you use them like we do in our household, you can never have too many! Juiced, grated raw into salad, sliced and pickled. My husband loves them and I never seem to be able to have enough of a steady supply.
Potatoes are another crop that you can never have too many of. They store well and are a staple for us over winter. You should already have a good planting of those in the ground but you can keep sowing if you have the room.
Weed and feed.
Every year I advise to weed and mulch in spring as soon as the ground gets warm enough for the weeds to take off growing. If you can get that done then, you will save yourself a lot of time now trying to keep up with the weeding. I am sorry to say that parts of my garden where I didn’t get the mulch on in time have been overrun and now I have to weed all over again. My poor flower garden gets a bit neglected in that regard and I always promise myself that I will do better next year. So make a note for yourself If you are a planner to set aside time in spring to get that done in a timely manner.
So your work for this time of the year is keeping up with the weeding and also keep up with the feeding. I usually have a liquid feed that I make with comfrey and seaweed etc that I water down and water in once a week. Keep water up if you are in a dry area.
Take the time to get out and enjoy the long warm days of early summer and enjoy your growing garden with its promise of beautiful healthy food for you and your family.
How to avoid overwhelm in the garden
Weeds in the wheelbarrow - how to avoid overwhelm in the vegetable garden.
Not a pretty picture! Weed overwhelm in the garden.
There’s nothing more soul-destroying than getting all excited about growing vegetables for you and your family and within a month or two your little patch of paradise is overrun by wild weeds. There is so much joy and satisfaction that comes from growing and eating your own vegetables that it is important that you don’t give up. So here are a few pieces of wise old gardener advice that I can give you to help with that problem.
1. Start with what you can manage.
First of all, don’t bite off more than you can chew. Weigh up how much time you realistically have and match that to the amount of space you are prepared to allocate. If you are working fulltime and running a household, then there may not be huge amount of time available for your project – its better in that case to start small and extend as you have the resources to do so.
Having said that, once you have planted out your beds, especially if you are following a system like I have laid out in the crop rotation poster, you don’t need a lot of time but you do need consistent regular time which, if you are organised, you can plan for. I suggest allocating one weekend a month for the big stuff like sowing your next batch of seeds and giving your garden a good going over, paying dedicated attention to care and cultivation. Then follow the little and often principle. You will be surprised about how much you get done in 10 minutes a day. Even if you set aside 15-30 minutes a couple of days a week to maintenance, hoeing, tilling, hand weeding, then you should be able to keep up with everything. Catching those weeds before they get any bigger than little seedlings will be what you are aiming for.
2. Make your vegetable garden an attractive place to be
Who doesn’t know how you can wander out to the garden in the evening with a cup of tea or a glass of wine in your hand and then pull a weed, then the next one, then the next one until you have just cleared a whole row. But you can’t do that if your garden is so far away that you need to pack a picnic to get there. Out of sight out of mind applies here. I always advocate having your garden clearly in sight, close to the kitchen in a nice sunny spot. Put a table and chairs in there, plant some edible flowers, fragrant herbs and plants to attract the butterflies and bees. Then there is nothing nicer than spending time in it.
3. Don’t do it alone.
Get the family involved. You will be doing yourself and your children a big favour if you can instill a love of gardening in them. Or if they are not showing much inclination in that area, then you will still be doing them a favour by teaching them how to work and sharing in that part of family life. If you are worried you will put them off gardening for life – I wouldn’t worry too much about that. When I was first married to a young Airforce officer and living in a married quarter on Hobsonville Airbase in Auckland, he used to tell me about how his father ‘forced’ them the weed the garden every week and they had to remove any little piece of greenery so no weeds dared show their face there again. Neither of us showed any interest in gardening until we moved into our wee house together and then we both literally became mad gardeners overnight.
Our own children had to put up being “dragged around” garden centre after garden centre and then squashed into a car full of plants, peering through a tree branch to see where we were going. The youngest, in particular, used to say that she was never going to a garden centre again when she grew up. However I can safely report that she has now ventures there often and although she lives in the city there is plenty of growing going on in the space she has available to her.
The oldest one has made a career out of growing and plant knowledge with a Degree in Medical Herbalism and then a Bachelor of Culinary Arts. Her “thing’ these days is edible flowers. She makes and sells the most beautiful flower decorated cakes under the brand Botanical Kitchen, most of which she has grown herself. Plus she creates healing and wellbeing products from plants. So don’t worry about putting them off but do be careful about not making it too much of chore. There’s lots of ways of making it fun and there is nothing wrong with training your kids up to understand what it is to be part of a family. Everyone may participate in the work, but then everyone also participates in the fun and pleasure that comes from eating your own food.
Daughter number 1 and her daughter number 1. Penelope Maguire - Botanical Kitchen.
4. Mulch, Mulch, Mulch
I am a big advocate of mulching your garden. Nature itself is pro-mulch, always clothing herself with a layer of fallen leaves, ground cover plants or autumn-fallen perennial or annual plants that have completed their annual cycle. Weeds themselves are just nature’s way of covering the earth with what is available. So if you have bare earth, you need to cover it with something of your choice or nature will cover it with something of her choice. You also are working with nature because when you use spent plant mulch, you are adding to the soil. The process of composting continues to take place, the worms love it, and you are not only reducing the amount of work you have to do, but you are feeding the soil, regulating its temperature and conserving water.
Use what you have available. Just be careful about anything that is full of seed or has been sprayed with something nasty. I used grass clippings but am very careful to not use when the grass has gone to seed. Straw, your own leaf mould, old rotted wood chips are some ideas. You can also layer it like you would compost. So you may start off in spring with some lawn clippings, then do another layer of pea straw on top of that etc. When you do use wood chips you may need to add a bit of lime or nitrogen to the soil underneath as the soil uses nitrogen when it breaks down and wood is also more acidic than some plants like. I know a garden where the gardener had used fresh wood chips and was wondering why his silverbeet was yellowing. The application of a bit of nitrogen helped but the more rotted the chips the better.
Also remember, especially if using fresh lawn clippings, to not put them right up to the plant itself. Make a little circle of space around the stalk of the plant and this will stop the plant rotting where contact takes place. For this time of the year in my cool temperate climate, the warm grass can create a little microclimate buffer of warmth for the wee seedlings as well.
5. Rest when you need a rest.
And finally, especially if you have created raised beds similar to the way I do mine, if this year you don’t think you are going to be able to manage the time at all, then cover the beds with mulch and leave them until you are ready. Sometimes over winter, I just lay down weed mat and leave it. By spring when I’m ready to plant, the ground is all clear and ready for me as well. Or you can compost the bed, chuck in a bit of fertiliser, lay down a good layer of wet newspaper or cardboard and then cover with a good layer of woods chips or other plant-based mulch and then leave until you do have time. It will still look great, you are feeding the soil, and it will reward you with strong healthy plants when you have the time. You can see from the picture I have used of the garden covered in snow, how the raised beds can look good even when empty of plants.
I hope this helps. There is so much joy in growing your own food and creating beautiful places around us that it is important for you to keep the enthusiasm up and not give up. The pleasure really will overcome the pain and anything good and worthwhile often takes a bit of work. So let me encourage you to keep going.
References in this article. Crop Rotation Poster. Click here to purchase yours online. https://professionalcountrywoman.com/useful-and-beautiful-things-to-buy/Crop Rotation Poster
Botanical Kitchen – to check out Penelope’s products or to order online click on this link. https://nzbotanicalkitchen.com/
Comfort Food
“It seems to me that our three basic needs, for food and security and love, are so entwined that we cannot thing of one without the other.” M F K Fisher.
“Soul food is our personal passport to the past.” Sarah ban Breaknacht
Mmmm….comfort food! It took me a while to find the right image for this post as I really wanted to put up an image of meat loaf with mashed potatoes and peas. However, it turned out to be very hard to find one that looked glamorous enough to headline a blog and catch the eye (in a good way) so you’re getting this delicious image of a piece of lemon meringue pie that I had made a week or two ago instead.
Delicious home made lemon meringue pie
Comfort food can be a tricky area for those who are preoccupied with health or weight – particularly if you have developed disordered thinking around food. While food is not to be seen primarily as providing comfort when we feel bad – there is no reason not to enjoy comfort food from time to time. The danger comes when we make it our go-to coping mechanism for dealing with uncomfortable feelings -even when we know the practice is futile. The trouble with using food to change our state from feeling sad, mad or bad, is that a lot of us spend a lot of time feeling sad, mad or bad, so we naturally end up living with the consequences of that behaviour including extra weight to carry. We add more pain to our state which then feeds back into that low mood state. It becomes an endless feedback loop. Food in that context may be a comfort, but it’s a counterfeit comfort and a fleeting one at that.
The Tortoise Diet Method is about breaking that cycle by gently asking you to take the time to step back and take a look at why you are feeling the way you do. Addressing and resolving the reasons behind your feelings and developing the behavioural skills to manage them is a key part of getting back to a life of wellbeing.
Once you do that, you can might even be able to get back to enjoying the pleasure of true comfort food! The one that connects you to memories of childhood and the feeling of being surrounded by family, warm and safe. The sort of food you don’t really get at restaurants but more likely when you go home to visit mum or Grandma. It usually involves carbohydrate of some kind with a rich savoury sauce that doesn’t require much in the way of chewing even. Mince and mashed potatoes? Smoked Fish Pie? Meat Loaf? Lasagne? Can I get an amen? What’s your comfort food?
I learned a lesson many years ago my husband of the time brought home a big corporate client to visit at the end of the day. He was visiting from the US with his attorney and they had come out to our country house for a visit. I also had been out all day at work and when I saw how the visit was going, I could see that they would end up staying for dinner and I wasn’t really prepared for that. However I managed to rustle up something a bit flash and we all sat down to enjoy a meal together. They had been travelling for some time and we were talking about food. About halfway through the meal, he put down his knife and fork and said “Do you know what I would really like to eat?” I waited for the answer. “Meatloaf” he said. Turns out he was tired of the endless hotel and restaurant dinners and wanted some good home cooked simple meatloaf. That was such a lesson to me but it did make sense.
There’s nothing nicer after a hard day’s work, especially if its cold outside, than to sit down to a plate of slow cooked goodness, rooted in good childhood memories, and lick that plate clean. So don’t ever think that in order to be slim that you have to forgo all your favourite foods and replace them with lettuce. Enjoy those experiences and make sure you share them with your family. How much better to pass on good food memories to our kids rather than memories of associating food with fear and restriction. Balancing good nutritious food with the enjoyment of treat foods at times of celebration, family favourites and yes – comfort foods when required. Creating a healthy culture around food is one of the biggest gifts you can give to your children (along with a plate of savoury mince, mashed potatoes and peas)
Bonus Recipe!
Pauline Mackay’s Meatloaf
You will need a lightly greased loaf tin plus a nice ovenproof casserole dish to bake this in. Its a two step cooking process and involves a surprise ingredient in the sauce – but a very popular family favourite.
500g Beef Mince
500g sausage meat
1 cup fresh bread crumbs
1 onion chopped
1 dsp curry powder
2 eggs
1 tbsp chopped parsley
½ cup milk
½ cup water
1 tsp salt.
Get in with your hands and mix all the ingredients together. Press into prepared loaf tin and bake in a moderate oven for 30 mins
Sauce
¾ cup water
½ cup tomato sauce
¼ cup Worcestershire sauce
2 Tbsp malt vinegar
½ cup soft brown sugar
1 Tsp instant coffee
2 tbsp lemon juice.
Combine all ingredients into a saucepan and bring to the boil stirring on the stove top. Simmer while the loaf is cooking. Pauline often adds a bit more water to make sure there is plenty of sauce!
After 30 mins, remove the loaf from the oven and carefully tip into another casserole style oven proof dish – one you can serve it in if you wish. It should hold its loaf shape by now. Then pour over the sauce and pop back into the oven to cook another 20-30 minutes. Baste every 10 mins or so.
Serve with plenty of creamy mashed potatoes and maybe peas to complete the comfort food factor. And as a bonus, if there is any left over the next day it makes a great sandwich filling.
Note: I got this off my MIL and have since heard its written up in the CWI recipe book as well.
August in the Kitchen Garden
“Spring stands at the gate with her finger on the latch”
I love this line by Patience Strong where she is perfectly describing this month where even though it is still winter, the promise of spring is in the air and popping up around us. She was of course writing in Northern Hemisphere so it was February she was writing for but the euivalent month for us down at the bottom of the world is August.
Even though it is still winter, there are signs that the miracle of spring is just around the corner. One of the miracles is that despite the ongoing cold weather, the occasional warm day will get the sap rising in the gardener as much as the plants! However you will need to resist the urge a little longer as it is a bit early to sow much outside just yet. Transfer that energy instead into preparing your garden beds and into getting your potting shed in order and prepared for sowing indoors which you can start to do this month. If you live in a warmer area, your spring is going to be earlier than where I am gardening in the south so adapt these notes to your conditions
Watch out too for signs of weed growth this month – this is a good sign that the soil is warming enough to germinate seed. Early peas, broad beans and onions can be sown direct this month. Even a row of early potatoes can go in the ground but continue to protect from frost. Others can be started off by chitting in a warm spot indoors. I would also sow extra peas and onions indoors as well just to keep all bases covered. Its easy to jump the gun a bit and sometimes it’s better to wait another month but I get that gardeners are ever optimistic.
If you haven’t done so yet, check your Crop Rotation Poster
and look under the Pre-season preparation in the cultivation notes around the outside and you will see what you need to do to prepare each bed for the family of crops you will plant. Legume beds (peas and beans) will appreciate lots of compost, wood-ash, blood and bone, lime and carbon from spring mulches dug in. Same for the next bed of green leafy vegetables.
Beds destined for root crops such as parsnips, beetroot and carrots will not like too much bulk or fresh manure so are happy to rely on the leftovers of the previous season. On the other hand, garlic, onions, celery and leeks that I grow in the same bed do love plenty of manure and compost so I usually divide that bed in half in terms of cultivation. They all appreciate deep well dug soil. The beds set aside for heat loving plants such as capsicums and tomatoes prefer more acidic soil so I don’t add lime to those beds but plenty of compost.
Those of you who have gown green crops over winter can chop and drop now and get that dug into the top 15 cm of the soil where all those lovely bugs can do their work of breaking it down. Whatever you do, never dig in wet ground though – wait until it is less sodden. Raised beds have the advantage here as the drainage is improved automatically and the soil can often be a few degrees warmer than ground based beds.
Seed potatoes are appearing in the shops. Potatoes can be chitted from now on or planted in a warm spot and protected from the frosts that will be expected for the next few months. Use old egg cartons, sit each potato on end and put on in a warm light space.
You may find you will need to water the garlic you planted in June and July to get them swelling and moving. It has been very dry here in Otago and we all need rain. Once the young shoots are up, liquid fertilise every couple of weeks. They will respond to plenty of feeding while growing and you will be rewarded with lovely big bulbs in summer.
Parsnips
I have come to the conclusion that I am a bit of a selfish gardener. I don’t tend to grow plants that I don’t really like to eat – and that includes parsnips. I am married to a proper southerm man though who does like them as well as those other cool climate root crops such as swedes and turnips so I am going to give them a go again this year. As for all of your root crop a deeply dug, well drained bed without any bulky bits in will produce the best results. The fertility from the previous year should be enough for parsnips and carrots but you can add a light dressing of lime and general purpose fertilizer if you wish. No fresh manure though – that is often a cause of forked roots and too much nitrogen leads to plenty of green leafy growth above and not much root growth. Parsnips need a long growing period so you can start sowing from late August onwards. Fresh seed is best and I have heard that pouring a kettle of boiling water over the seed row is helpful. Maybe that is something you can experiment with – try it on one row but not the other and see if it works.
August Cultivation
If it is still too early for outdoor sowing in your area you can start off in seed trays in a warm spot. Asian greens, Lettuce, cauli, cabbage, cauliflower, broccoli, silverbeet, peas, broad beans, Parslely, coriander, rocket. Later in the month: onions, beetroot, carrots, celery, leeks, parsnips (direct), turnips, parsley. Sow early peas and broad beans direct and in some trays indoors just to be on the safe side. Get your garlic in if you haven’t already.
Plant; Cabbage, Cauli, Lettuce, silverbeet, Rhubarb, Asparagus, Shallots, Onion, Garlic, Artichokes, Strawberries, potatoes (keep protected from frost) cabbages, silverbeet,lettuce, parsely, peas, broadbeans.
The Organised Gardener
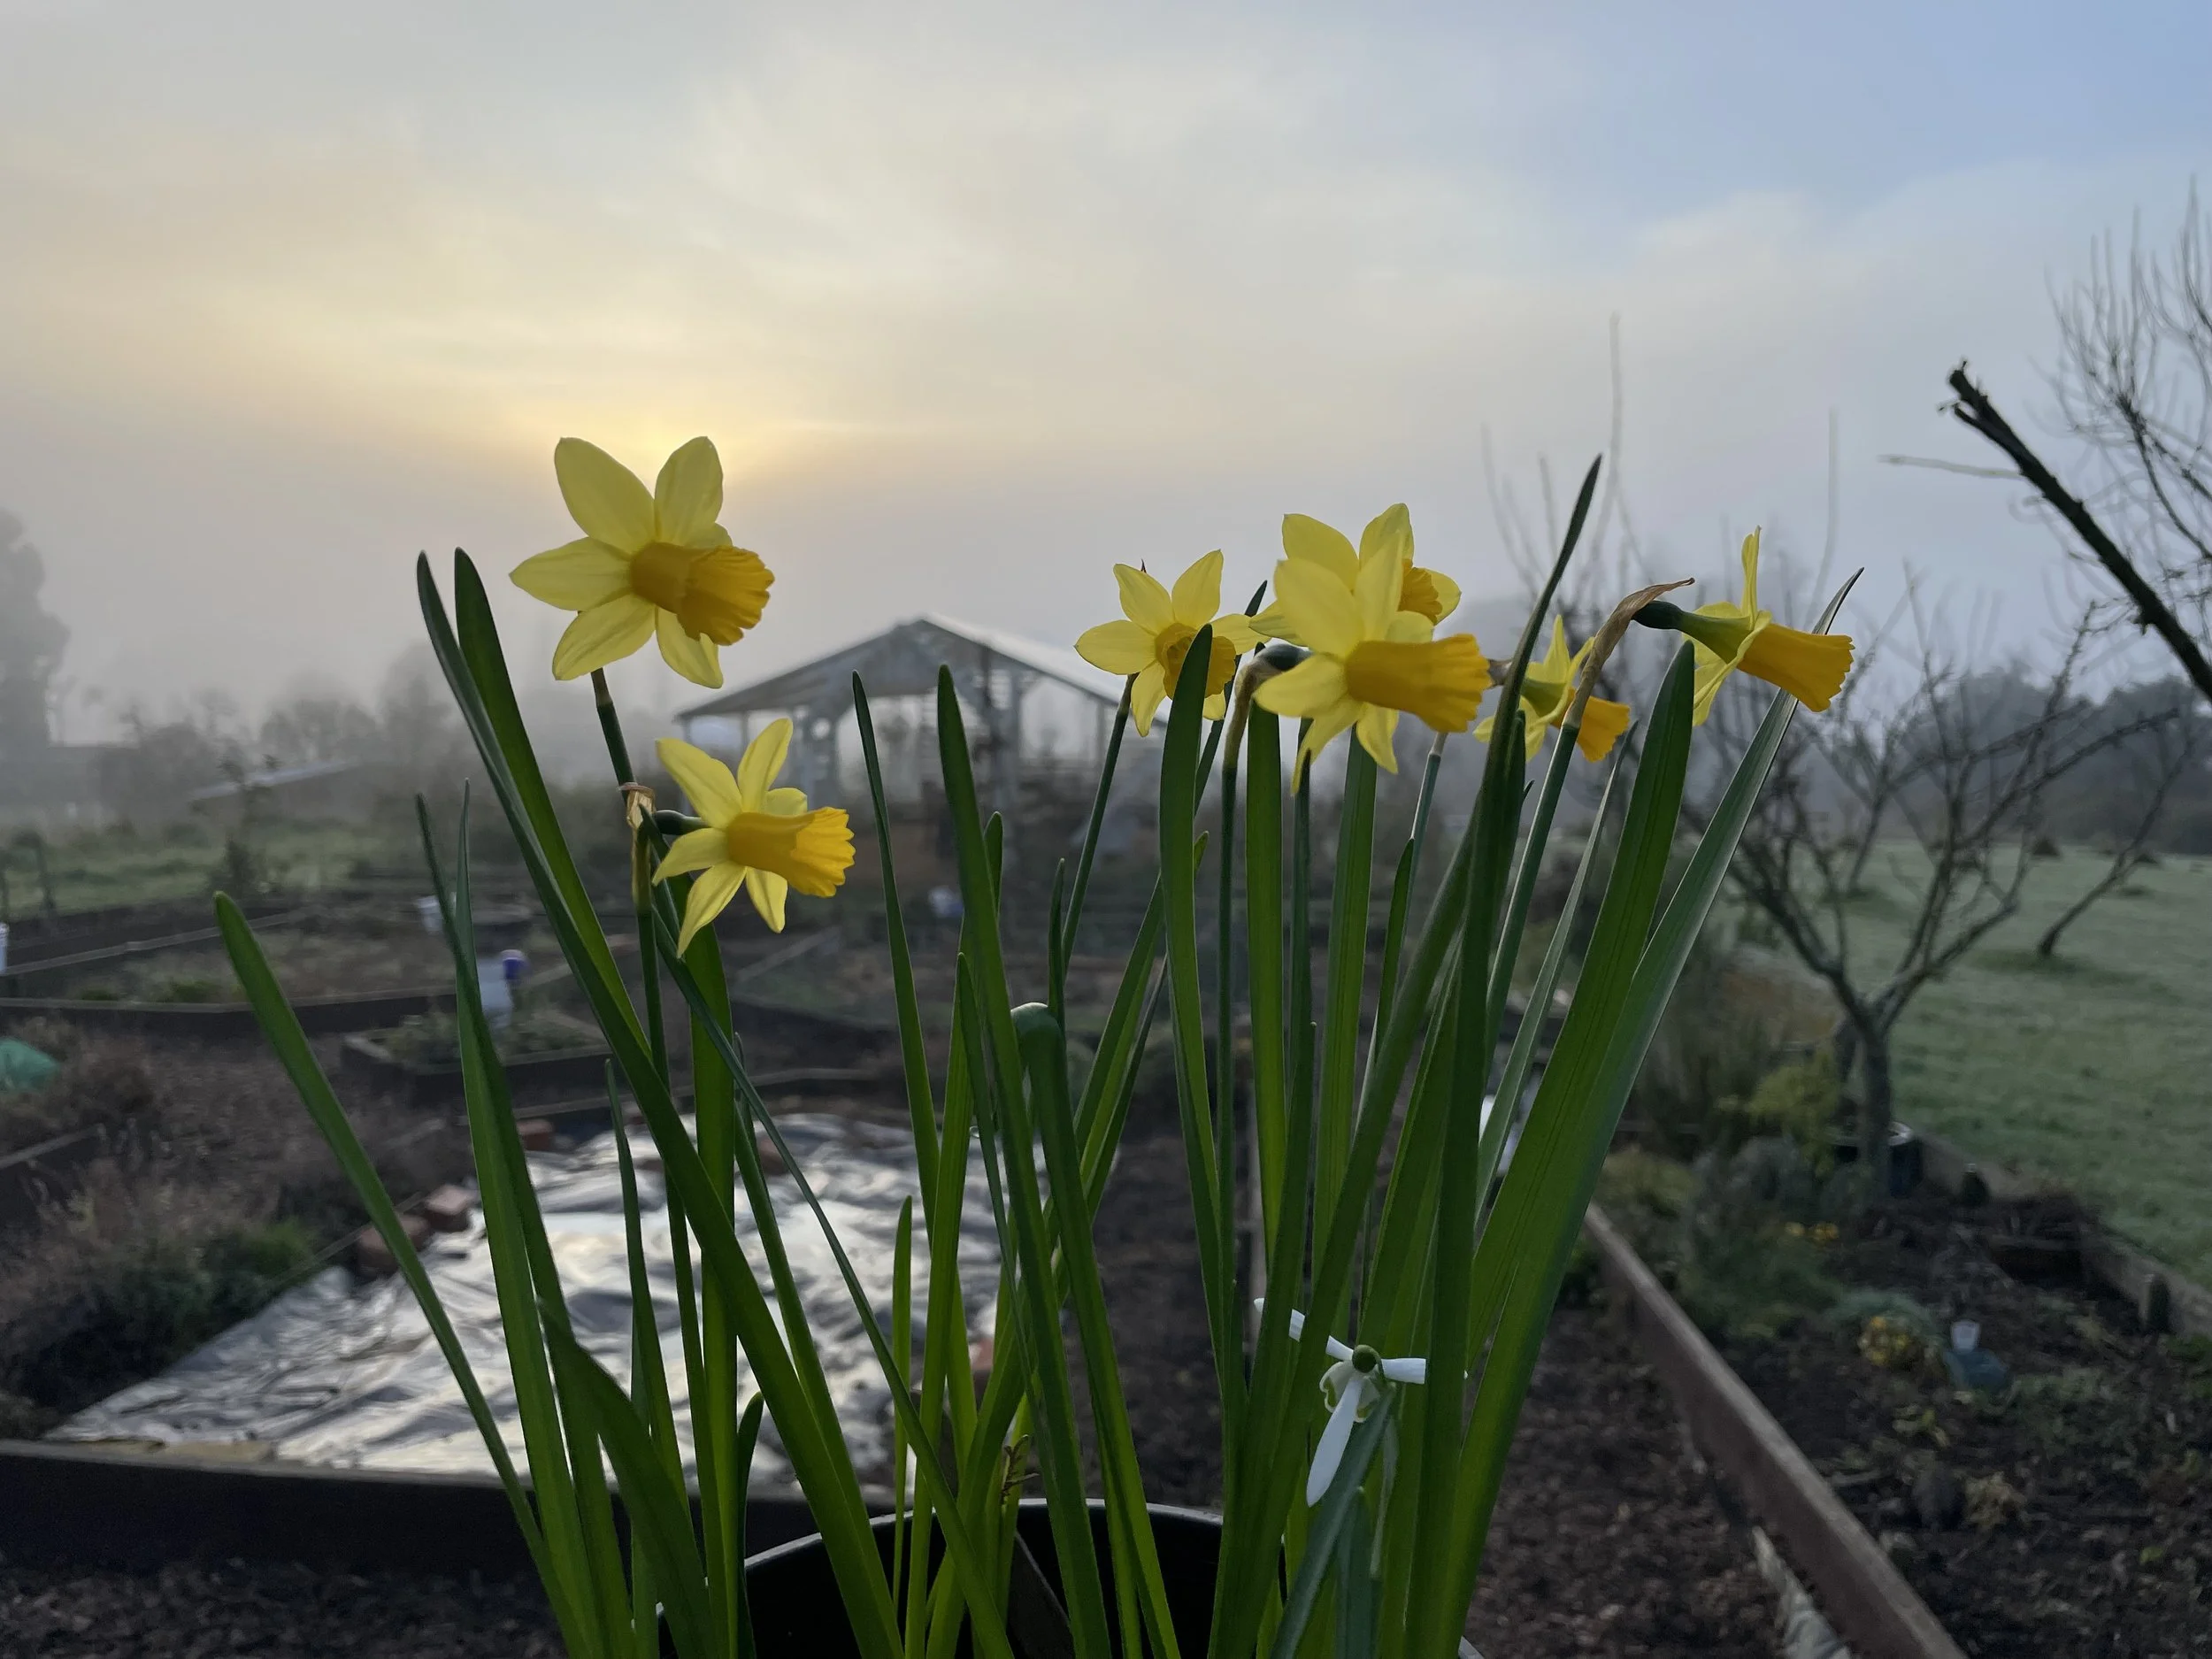
July here in our part of the world is till the depths of winter and although I’m thinking and preparing for the new season – there is not much time spent in the actual garden. It is great to get out there on frosty morning to see how the ground is chilled and laced with ice – and to think triumphant thoughts about slugs and other pests not surviving the winter chill to make it through to eat my precious spring plants. And then there is the occasional warm day when you notice that the daffodils are emerging and you realise that even when you can’t see it, there is still growth and movement going on.
It won’t be long till spring will be upon us so use this time to get yourself organised. Give your garden shed or whatever you use as your potting area a good clean up. My potting shed is in the hothouse so its not a bad place to be on a cold winter’s day. Get rid of old rubbish, stack all those plastic seedling trays that came with last year’s plants from the garden centre and recycle this year for your own seedlings. If you have an old bath or tub around the place – give all the plastic pots and punnets a good wash first if you are worried about the transfer of disease. At least give them a brush to get off any dirt and cobwebs etc. Have them stacked ready to go for sowing time.
Tools can be sharpened and maintained. Give them a good clean and oil with a bit of linseed oil and hang on the wall or at the very least put into the one space where you know they are and all ready to go. I don’t know how much time I’ve wasted hunting around for my trowel or dibber or anything else I suddenly need and can’t find because I haven’t put it back where it’s supposed to go. I have a lovely trug that I put all my bits and pieces in so I can just pick it up and take it to wherever I am working.
Make a list of what you are going to need for the new season. It’s quite helpful to have a blackboard in your space to be able to write on. Potting mix, seed raising mix, tape measure, string line, dibber, trowel, garden fork, chalk, plant tags, notebook and pen, scissors. Add what you need as you think of it.
One or the most important items in the organised gardener’s toolkit is actually some kind of permanent marker. You’ve heard it said that the pen is mightier than the sword, but how much mightier is the sharpie than the gardener’s memory! How often have I planted or sown seeds and told myself I’ll remember what they are and when I sowed them. It doesn’t take long until I look at that tray on the bench a couple of weeks later (when the seeds are still thinking about coming up but haven’t emerged yet) and wonder what the heck they are! Or even worse, sow a row of seeds in the garden and either not mark where the row is or name what I have sown. If there is more than one of you gardening then the danger is even higher. The ‘other gardener” (also known as husband) might come along and not realise you have already sown seed in that row and merrily dig it over to do something else. More evidence for my theory that there should be separate spaces for men’s and women’s gardens.
Get yourself a good new sharpie and a good supply of plant tags so your are ready to record the variety and date sown or planted. For my seedlings I just use wooden popsicle sticks. You can get these very cheaply from any craft store. The trick Is you need to write on them before you sow the seeds as once you get a bit of moisture on your fingers they don’t work too well. You can also get the bigger size wooden ones that are suitable for the garden bed. They may only last the season but they do the trick. Hunt around your local garden centre for whatever they have there and get what suits you and your needs. But always- always make a note of what you have sown.
If you have lots of packets of seeds all over the place then a good rainy day exercise is to get them all organised. My background is in librarianship so I have a thing about organising so that you can find what you are looking for. It is a family joke about the spices in the pantry being sorted into alphabetical order but I put up with it for the pleasure of finding the ginger when I need it so I pay no attention to the smirking.
“Monty Don” potting box
When it comes to seeds, I find it best to sort into family or companion groups which is how I organise my planting in the Crop Rotation Calendar. If you don’t already have a copy you can order either a digital or hardcopy by going to this link. Crop Rotation Poster It is a good tool to help you with your planning. I have divided up the planting into 4 main companion groups so file seeds under those headings. All root crops together for example, and all leafy greens together. Then have a space for herbs, perennials, and flowers. I use a plastic box with a good airtight lid to store them in so find a box the right size for you. Cut up some card to make dividers and label them. Then sort them into their spaces, put the lid on and store is a cool dark dry place away from humidity and pests.
If you want to get really organised I am going to do an online workshop on how you can preplan your new season’s vegetable garden so you are ready to go in spring. That’s when those garden markers and sharpies come in really handy! So let me know if you want to find out more about that and I’ll let you know when its ready to go.
In the meantime – grab a moment on one of those lovely warm winter days and get yourself organised for a great new growing season. You will thank me when you spring hits and you suddenly feel the urge to get out and get growing – and you’ll have everything ready and waiting for that moment!
Ceremonial Planting Of Winter solstice Garlic
Well the mid-winter solstice is upon us now and today I am going to be doing a bit of a tongue-in – cheek ‘ceremonial” planting of garlic. It is traditionally planted on the shortest day and harvested on the longest and as I am a fan of tradition – I am going to plant some in a facebook live. All going well. Meaning – if I can get my husband to be the cameraman as I won’t be able to plant, talk and hold the camera at the same time.
The other reason I wanted to mark the occasion is that it is the point at which I rotate my vegetable beds around to the next year. So the beginning of the gardeners New Year. It coincides nicely with the traditional Maori celebration of Matariki – the rising of the star cluster of the Pleidies or Matariki in the eastern sky – the signal to finish gathering all the old year’s crops and start preparing for the new. Worth taking time to mark the occasion!
Although we always associate garlic planting with 21st of June, you can start planting anytime from the autumn equinox and aim to get it in by the shortest day. For those with warmer climates and the risk of rust in the heat of summer, then planting earlier is a good idea. (note to self for next year)!, Having said that, it is better to get it in the ground when you can rather than not at all so don’t be put off by strict rules but get planting. I have planted well into July before and still get good results.
Most imported garlic is treated with some fairly drastic chemicals so garlic is definitely on the list of things to plant in your family vegetable garden. Not only can It be used as a culinary food but it has wonderful therapeutic qualities – great for our immune systems. How much you plant depends on how much your family needs. If you think that you use one big clove per week – then plant 52 plus a few extra for unexpected occurrences. Then plant another 25 or so to ensure you have seed for next year. Garlic seed is getting harder to come by these days and it is something you can grow yourself then do it.
If you haven’t done so already, add plenty of manure, compost and blood and bone. Some wood ash and a little lime is also beneficial. I mark out rows then lay out the cloves around 15cms apart. Plant at twice the depth so between 2-5 cms apart. Space between rows is up to you. I put mine 20-30 cms apart which is quite intensive but you do need to be able to hoe down each row if needed. I then water in with a bit of liquid seaweed once they have started to grow and mulch with whatever is available. I also have to cover mine with some wire netting to prevent the occasional naughty chook from foraging for my precious cloves.
For me following the Crop Rotation Poster, I have completed a four-year cycle and so going back to the year one plan. So it’s a good time to pick up your own copy of the Poster plan, join the Crop Rotation and Garden Calendar facebook group and follow along. Great if you are starting out in the vegetable garden or don’t know where to start! You can also get the digital copy and print it yourself.https://www.facebook.com/groups/353726023718424
Wrap up warm and enjoy your forays into the winter garden in between sitting by the fire planning your spring garden.
June in the Kitchen Garden
The Gardeners New Year
There is always a powerful psychological factor when it comes to new beginnnings. As humans, we love the idea of ‘turning over a new leaf” and starting afresh don’t we? I think every day is a chance to start afresh and do my best to create a better outcome each day but for many of us, we love the idea of a whole New Year stretching out into the future 12 months.
Our traditional New Year in New Zealand comes to us from our European forbears where it falls on the winter solstice – the longest night – but over here on the other side of the world, falls on the summer solstice. So we miss the connection to the land and the cycles of the food-gathering season that it is tied into. It doesn’t stop us loving the idea of the New Year though and I’m all for a starting point to kick off a chance to put our ideas, thoughts and dreams into planned action!
So we can take advantage of the talk of the Maori New Year here in New Zealand with the commemoration of Matariki. This is traditionally a commemoration of the start of the new garden year for Māori and a time to get together, finish harvesting the previous seasons root crops, give thanks for what has been received, and prepare hearts and thoughts for the new year.
The name refers to the star cluster Matariki – known by the name of the Pleiades or the Seven Sisters in other parts of the world – which makes its first appearance as it rises over the eastern horizon just before dawn. It’s always good in my book to reflect on what has gone before and be grateful. It is a very good foundation to prepare for the future year as we follow the seasonal cycle of our beautiful planet around the sun.
As Matariki is close to the shortest day (or the longest night!) it is a very traditional time for tidying up, planning and getting organised for the coming new season – just as it was for both our Maori and our European forbears. As its cold, dark and miserable for a lot of the time (we still have gorgeous sunny days of course!) and we don’t really want to be going outside too much, then use the time to think and plan your garden for the new season.
The traditional shortest day planting time for garlic means that it is the star plant to symbolically kick off the new garden rotation. If you are on facebook you can see my rather hilarious live version of a symbolic planting of garlic. I’m just going to say – it was my first live ever and didn’t quite go to plan so it has some interesting camera angles and they are not always flattering. I have toyed with the idea of taking it down but haven’t. Gardening is by definition a humble past time – so I am happy to stay humble and not be always present a perfect image to the world.
So Matariki is the gardeners New Year. This is when I rotate the beds to the next year in the four year cycle. You will still have plenty of vegetables finishing off their own cycles from the previous year, so its not like you clear all the beds and shut them down for winter. I have lots of brassicas slowly growing which I do liquid feed every 3 weeks or so, and know that they will start to take off in a month or two as the days get longer and the earth starts to warm up. So I am eating from that bed and planning on eating from there in the coming months. All the potatoes have been lifted and stored and we are enjoying them in all the ways you can enjoy them in our old coal range. (wood-fired). Winter is the time we enjoy our root crops. Parsnips, carrots, beetroot – I tend to lift them all by now as we can get some hard frosts in the Otago region. I don’t really grow turnips or swedes mysef but they are a traditional southern crop that loves the proper winter weather. My husband is a proper Southerner and grew up munching on a bit of raw swede but he can grow them himself if he really wants them.
Take the time to chat with your family about what they want to eat and use to guide you in what you want to grow. Get the kids involved. Look at the seed catalogues out now – and get your orders in. We are so lucky that we have garden centres now where it is possible to purchase well-grown seedlings and plant them when the time is right, but its still good to grow your own from seed. We are also so lucky in the wide range of excellent seed suppliers out there so choose your favourite suppliers and start dreaming of spring.
There are so many advantages to sowing your own. You get access to a lot more varieties, you can practice succession sowing over the season to ensure a good food supply, you can sow more than you need so can share with others, and you can experience the satisfaction of working with nature and watching that seed you sow fall to the earth and disappear – only to be reborn as a brand new plant!
July at a Glance
Feed and keep weed free any plants still growing. Chop and dig in any green crop sown in autumn. Keep adding to your autumn compost pile as you come across suitable material but keep covered either with straw or other water proof material. Keep tidying up old spent plants, pruning fruit trees and getting your potting shed ready for the spring busy time. Sharpen tools.
In cooler parts of the country you can sow or plant garlic, shallots, onions, cabbage, perennials such as rhubarb, asparagus, artichokes, strawberries and start chitting potatoes for later planting.
In warmer areas – sow or plant broad beans, peas, carrots, beetroot, silverbeet, spinach, lettuce and chit potatoes. Plant perennials such as rhubarb, asparagus, artichokes and strawberries.
Seed Potatoes
You can use your own potatoes for seed. I know it is a good idea to purchase seed that has been certified free of disease but if your potatoes are disease free and good and healthy then there is nothing to stop you doing so. We are seeing a bit of scarcity out there at the moment so be prepared in case there is a seed shortage. Choose smallish potatoes – around the size of a large egg, wrap up in newspaper and store in a single layer tray. Keep in a dry dark place until late winter when you can start chitting them in trays on the window sill.
Enjoy your long weekend and keep growing!
May in the Kitchen Garden
Professional Countrwoman Garden at Bellbird Hill Otago New Zealand. Entrance Gate. Autumn Garden
What’s happening in your garden this month? Its always handy to get out there and make a note of what is fruiting, flowering, growing, dying, being harvested – anything that is happening in your garden this week or month. Having a garden journal is really helpful – especially when you are learning and you are getting to know what your own particular patch of paradise is looking like. So let me encourage you to get out at least once a week and make a note – or even take some pictures for future reference.
As all of you who are following the Crop Rotation method outlined in the poster (see below if you don’t know what I’m talking about!) this is a month by month guide to your growing year – and then setting you up for the following one. Here in the Southern Hemisphere we are in late Auttumn and for me at just about exactly on the 45Degrees South latitude (halfway between the equator and the South Pole) in a temperate climate, that means the frosts have started and most of this season’s crops are coming to an end.
There are still plenty of crabapples on the trees, hawthorn berries in the hedges, fruit on the ground and vegetables to be gathered. I went through and did my own list. At the moment there is still some sweet corn, tomatoes, capsicums and chillies (the last ones). Carrots, onions, lettuce, celery, silverbeet, potatoes, parsley, sage, rosemary, fennel, – and then there will be more lettuce and all the brassicas that are still getting a bit of growing time before winter truly sets in.
Today I popped out and did a quick video of the bed that I have been growing Group 3 plants in – the ones that like warmth such as tomatoes, capscicums, courgettes, corn and pumpkin. Most of the tender subtropical plants have been well and truly frosted so time to give this bed a good cleanout and then get it ready for the next cycle in the Crop Rotation Plan. My garden New Year is in June with the official planting out of the new seasons Garlic. So work this month revolves around clearing out the old and prepping the beds for the new.
So I’ll start with Group 3 Bed and then do some more about the others in another post. You can find the video on mentioned above on the facebook group – see the link below.
I’ll also put up a recipe for Mint Jelly that I made using all those beautiful crabapples and the last of the mint.
I know I cover a few topics of interest to the professional countrywoman out there but some of you are here for the KitchenVegetable Garden notes. So for those who are following the Crop Rotation Poster and want more info and details on that then feel free to join the Crop Rotation Poster and Garden Calendar facebook group which you can find here. I’ll post the video mentioned above there as well as on the PCW facebook page.
https://www.facebook.com/groups/353726023718424
https://www.facebook.com/groups/353726023718424/permalink/457695423321483 for the video post.
The passing of a special Professional Countrywoman
Janette Kemp RIP to an extraordinary Professional Countrywoman.
It’s been a while since I have posted on my blog – I have been MIA for a while this year and for good reason. My lovely mother, an amazing archetypal Professional Countrywoman, passed away peacefully in April and I had the honour of helping with her last few months of care, along with my sisters and brothers. She went a bit earlier than she should have, but peacefully all the same having had a long and fulfilling life.
She was a little atypical of her generation having taken on a Pharmacy apprenticeship as a young woman, a career which she continued with later on in life while raising seven kids and helping with the farm. She married the handsomest man to arrive at the Bible Camp which is where young women were meeting boys in her day, moved to the farm near Helensville on the South Kaipara, and went on to create a beautiful home and fill it with babies. We even had Grandma live with us.
She loved antiques and beautiful fabrics and wallpapers and knew how to make all the soft furnishings. I remember her making loose covers for a whole lounge suite, wallpapering the very high stud walls of our old farm villa, even stripping back old kauri furniture for our dining table. She could tan hides – not just ours (which she didn’t but probably wanted to sometimes!) – and break down a carcass. One day the plunket nurse turned up one day to see one of the babies she regularly produced, to find mum presiding over a table full of freshly butchered cattle beast she was prepping for the freezer.
There are pictures of us three girls all wearing dresses she made for us, lined and beautifully made and matching the one she was wearing. We were all taught to sew as well and make our own clothes as teenagers. She spent hot summer days preserving the fruit off the trees, or boxes of fruit from the local orchards. Always plenty of puddings with cream available for the winter. She could bake better than anyone and there was a lot of tin rattling going on after school as we raided the stash for afghans or yoyoes or chocolate slice. Dinner was always at the table and there was always at least 10 around that table – often more. Her hospitality was legendary.
We were encouraged to read widely of all the books filling up the book shelves, classics, mythology, good literature and anything from the local library. We were all expected to go to University – especially the girls. Her one indulgence was beautiful country magazines. Australian Home Beautiful, UK Country Living, NZ House and Garden, and more recently Australian Country Style and NZ Life and Leisure. She even had a regular order with Oamaru Paper Plus who would post her monthly order up to my sister’s house in Woodhill where Mum was mainly residing while receiving treatment through the Auckland Health system.
We absorbed it all without even realising it. I didn’t know I was interested in gardening but literally became one overnight – the day my brand new young Flight Lieutenant husband and I moved into an Airforce Married Quarter at Hobsonville, Auckland. I haven’t stopped gardening and creating my own beautiful spaces for my own family since then, even though I now have a different husband and live on a different Island. Most of my favourite furniture pieces have been generously donated from her collection and I am not parting with them.
Mum was a beautiful redhead in her day and that hair never went grey. It just faded like a rose that had just gone past its full bloom – fooling those who didn’t know her into believing she was younger than she was. She had a young spirit and never lost her curiosity for life or her love for babies. She got to see her great-granddaughter, Elderflower, who entertained her on a final visit in April this year, and kept on the watch to see where the next one might possibly be coming from.
Then she was gone. Surrounded by the family members who were there at that moment after a day or two of story-telling, laughter and music. Life took its course and took her with it. She knew where she was going and it showed on her face right to the end. It was as good as it could have been.
But it is sad. Really sad.
It still is. We all think she is still up the road and just a phone call away to tell her the latest thing that Elderflower said or the beautiful Pierre de Ronsard that has flowered into the frost. But that spirit of hospitality, generosity, curiosity, and the love of beautiful quality art, furniture, fabric and spaces lives on in her children, her grand children and I’m sure into the future.
She was my role model for a countrywoman: raising a family, gardening, cooking, working, travelling and most of all, being the matriarch and showing the way for those of us who follow. Thanks.
Rest in peace Mum.
Post first published 11 June 2023
April at a Glance
It all begins with an idea.
Sow:
Broad Beans, onions (in trays or outdoors if warm). Brassica seeds sown now will take 4 months to mature. Lettuce. broccoli, cabbage, carrots, Chinese cabbage, leeks, lettuce, onions, parsley, shallots, spinach.
Plant:
Cabbage, broccoli, cauli, kale, lettuce, parsley, silverbeet or spinach, strawberries, soft fruits such as currants, raspberries etc, fruit trees
Cultivate:
Mound up soil around leeks. Keep well-watered along with celery. Weed around asparagus. Protect heads of cauli from the weather by covering with big leaves. Keep weeding and hoeing between plants to keep weeds down.
Harvest:
Beans, courgettes, sweetcorn, pumpkins, main crop potatoes, carrots, parsnips, beetroot, spinach and silverbeet, herbs
Prepare:
Dig beds where crops have finished, add compost to trenches, Sow green crops, make compost and mulch bare ground in preparation for winter weather and preparing beds for spring.